Fluid Art Pouring Mediums How I Mix My Mediums Beginner Acrylic Pouring Tutorial
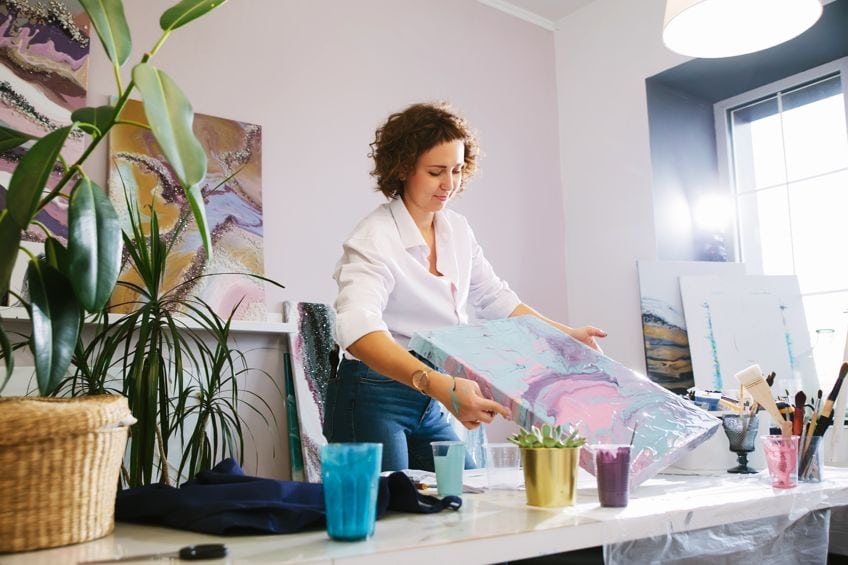
One of the more increasingly popular fine art forms or hobby ideas is fluid art painting. This is a wonderful technique of painting with acrylics that tin can easily be used by beginners. Pouring is likewise a lot of fun and therapeutic every bit well. However, you lot practise demand materials and to learn some paint pouring techniques before you begin. So, keep on reading to find out more about how you can start acrylic pour painting.
Table of Contents
- i A Description of Acrylic Pouring
- one.1 Pros and Cons of Acrylic Paint Pouring
- 2 What Materials Are Needed for Fluid Art Painting?
- two.1 Do You Need a Pouring Medium?
- two.ii Canvas or Substrate
- 2.3 Other Acrylic Pouring Materials
- three An Acrylic Pour Painting Tutorial
- 3.1 Mixing the Acrylic Paints
- 3.two Pigment Pouring Techniques
- 3.iii Finishing Touches
- iv Acrylic Pouring Tips and Tricks
- 5 Frequently Asked Questions
- 5.1 What Is Pigment Pouring?
- v.ii What Is a Pouring Medium?
- five.3 Why Is a Blow Torch Used in Acrylic Pouring?
- 5.iv What Are the Best Paints for Acrylic Pouring?
A Description of Acrylic Pouring
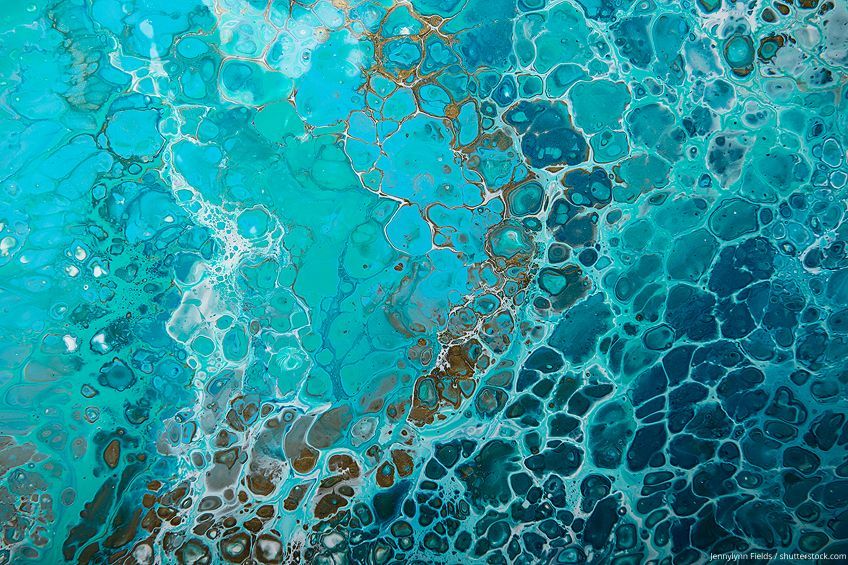
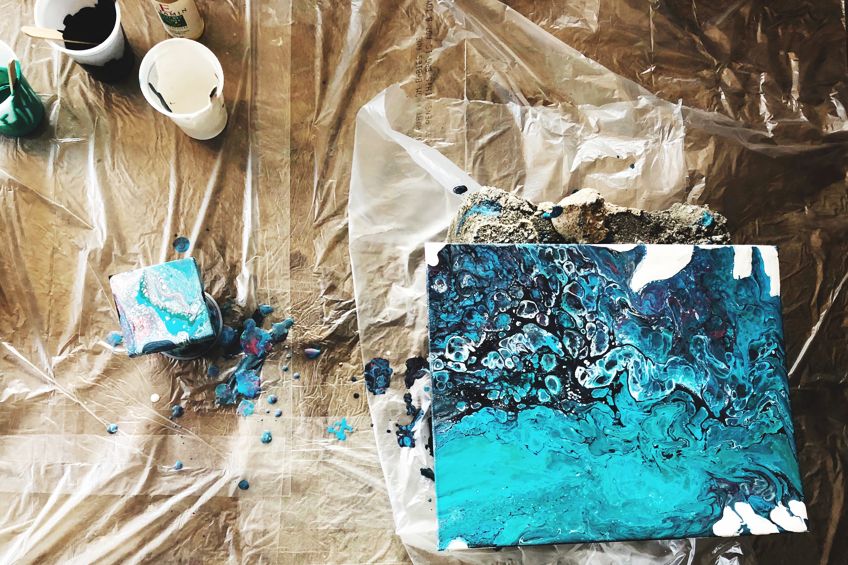
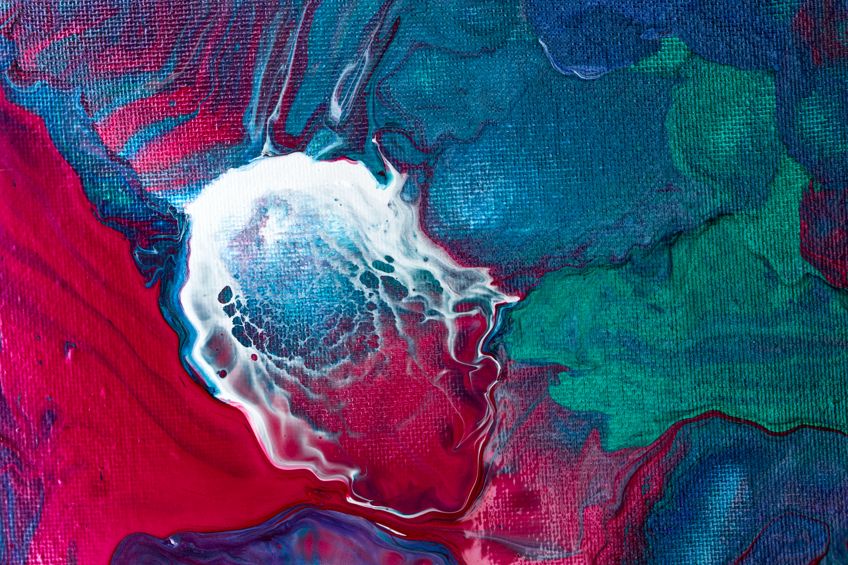
Acrylic pour painting is a painting technique where fluid acrylic paints are poured over the sheet. By using various paint pouring techniques, yous tin can create pools or puddles of color, equally well every bit create marble-like effects. The technique was kickoff discovered during the 1930s quite by accident by a well-known artist by the proper noun of David Alfaro Siqueiros. He poured various colors of paint over each other and let the paint run, creating patterns.
More recently, this method of painting has been revived, with a few advancements in the process. When pouring the fluid paint, it appears smooth and sleeky and can create some dramatic, abstruse, and contemporary results. Whatever paint pouring techniques you use; you will need to adapt the acrylic paint past calculation in the pouring medium. The medium helps to alter the consistency so you lot tin pour information technology smoothly and forbid whatsoever cracking once the paint picture show dries. Once you have poured all of the fluid paint colors, the canvas is and so tilted so the pigment covers the entire surface, including the sides.
Y'all will accomplish varying results due to the blazon of paint you lot use as well as the pouring you lot add together and other additives.
Pros and Cons of Acrylic Paint Pouring
Even though acrylic pour painting is something that almost everybody can do, there are a few advantages also as some disadvantages to fluid art painting. Although, the pros definitely outweigh any cons.
Pros of Acrylic Paint Pouring
Beginning of all, we accept already established that acrylic pouring is dandy for beginners. This is as well a skilful method for those who do not take a lot of time on their hands, equally it does not accept long to complete a project. You also practice non need all that many tools and supplies, and the unabridged process is simply fun. A few more than advantages are included beneath.
- Perfect for most ages, from immature to old tin bask the benefits of pour art.
- As with most other art forms, it is a great stress reliever.
- In that location are various acrylic pour techniques, and so you tin can create many different patterns and pours.
- The final painting can be enjoyed in many ways. For example, as a gift or to sell, or to use as a decorative slice around the firm.
- Fluid fine art painting is open to interpretation, then yous practice non necessarily crave whatever painting skills as yous would with normal painting and sketching.
Cons of Acrylic Paint Pouring
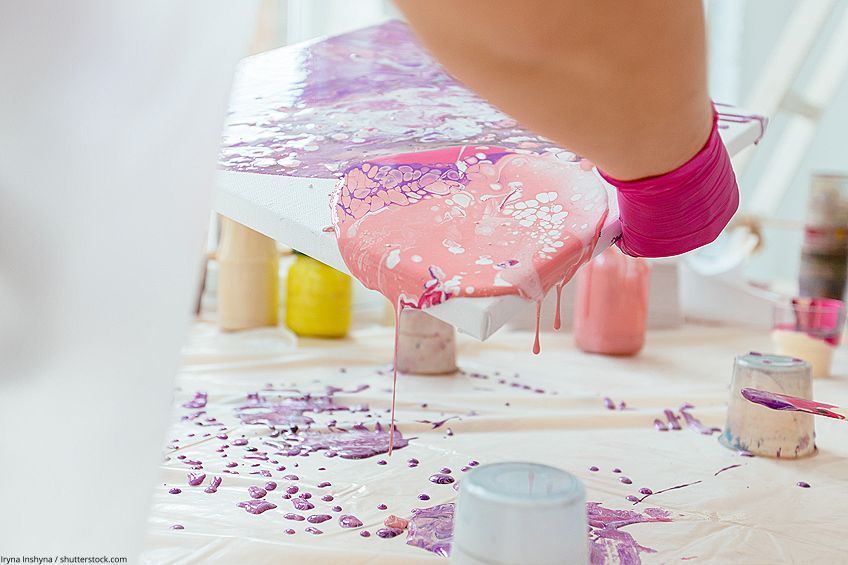
There are a few disadvantages when information technology comes to paint pouring. The chief one is that pouring can get quite messy. You will need a designated space to work, and you will need to cover the surface you lot work on to prevent spills. Some more disadvantages are laid out below.
- There is quite a chip of paint that you utilize and might waste material when you exercise this type of pour art.
- Some of the supplies and materials needed tin can be quite expensive.
- It needs quite a lot of time to dry, then when the acrylic pouring is done and drying, it can be damaged. For example, it tin can be knocked over or dust can accumulate on it.
- It can be a very messy procedure.
What Materials Are Needed for Fluid Art Painting?
Before yous begin your acrylic pouring journey, you need to make sure you lot accept all your supplies ready. You do not want to exist in the middle of a pour art projection, just to observe you need something you forgot to get.
Of course, the near of import cloth in acrylic pour painting is your acrylic pigment. Since there are various kinds of acrylic paint, you must choose the best ane. For case, you have your heavy torso and soft trunk acrylic paints.
The all-time option is a soft body as this has a lower viscosity compared to the heavy body acrylics. When pouring, information technology should continue smoothly and evenly, without bubbles and clumping. Yous can utilize heavy body acrylics and educatee grade acrylics, but both require a lot more than pouring medium and cost more besides, then these are not the best pick.
As well the soft body paints, there are now loftier-catamenia acrylic paints, and yous can use acrylic ink or fluid acrylic paints. The colors used are completely your choice. When starting, maybe endeavor not to use too many colors as the effect could go also decorated.
Some of the more than popular paints include metallic and glitter paints, which add an bonny addition to the painting.
Practice You Need a Pouring Medium?
At present that y'all have your pigment, you need something that will create the perfect consistency for pouring. The pouring medium is what helps to create the perfect consistency for pouring. Every bit in that location are various options for pouring medium, we have provided one of the products we recommend below.
The principal reason for using a pouring medium is to provide a smooth and even pouring experience. It is of import to get a good quality pouring medium if you want the best results, even if it does add to the costs when pouring.
At that place are cheaper alternatives like Elmer's glue or PVA gum, but these do not guarantee proficient results and are unpredictable, with minimal command over what happens. This might be simply good for experimentation if you wish to endeavor information technology.
A adept pouring medium volition exist self-leveling, which too means y'all will accept fewer pockets of air caught in the terminal painting. The consistency is also accurate, a kind of honey consistency that tin can adhere to surfaces without being as well runny. The professional person quality pouring mediums are also archival, which your basic PVA glue is not. Pouring medium as well offers these benefits.
- The paint colors remain vibrant
- Proper adhesion is formed
- Correct menses consistency
- Few to no issues with cracking
Yous can as well not simply add together h2o to the acrylic paints to make them thinner. The water does not provide the right consistency, the colors become less vibrant, and y'all will have a problem with cracking when the paint dries.
The different pouring mediums offer various properties. Yous can get pouring mediums with varying consistencies from thin to thick. Some pouring mediums have an additive that makes it glossier, while others dry out but remain sticky so brand certain to get a medium that will dry out hard.
The flowability of the medium is of import, and some mediums have perfect and even distribution of the paint, while others are more difficult to work with.
You should also look out for pouring mediums that are archival or provide UV protection. Some other difference in pouring mediums is drying times, some dry out overnight, while others tin can have days to dry out.
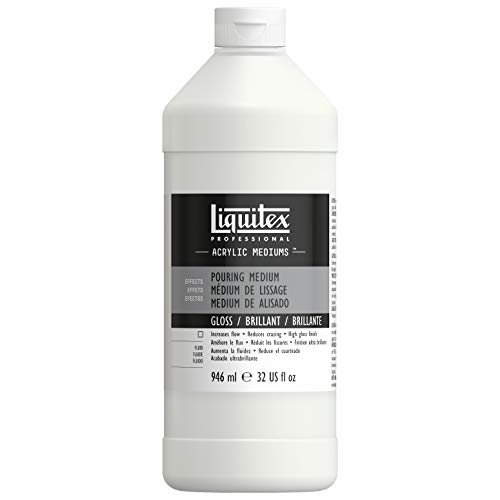
Best Pouring Medium: LIQUITEX Professional Pouring Medium
The Liquitex pouring medium volition create an even, flexible, and high gloss pour every time. The pouring medium tin be used with all acrylic pour techniques and will non cause any cracks or bubbles once the painting has stale. When it does dry, your painting will have a prissy wet and glossy appearance. The pouring medium will also not xanthous over time and becomes h2o-resistant when dry out.
- A fluid medium with acrylic polymer and high resin solids
- Creates even puddles, poured sheets, and flowing applications
- Mix with Soft Body Acrylic to promote drying with an even picture
View on Amazon
PROS
- Professional quality
- Glossy and even finish
- Provides the correct paint flow
- Little to no cracking or bubble issues
- Colors remain vibrant
CONS
- Expensive
- You volition demand to employ gloves
Canvass or Substrate
You can exercise acrylic pouring on almost any surface as long as it has been properly prepared or primed. Many prefer to cascade onto stretched sail, while others may like canvass boards, painting panels, wooden painting panels, or gesso board, which is a wooden lath that has been pre-primed. Some of these surfaces are more than rigid than others.
Since you are going to be using a lot of paint on the surface, the painting ground is important. This is simply a layer that is applied that offers back up when painting and is ordinarily water-resistant. When purchasing your surface to piece of work on, you can always check to see if it has already been primed.
You lot should always fix the surface before painting. If you do this, you can pour onto things similar cups, trays, tables, or glass. If you choose a sail that is not pre-primed, yous volition demand to prime it yourself. You can do this by using Gesso, which assists with the adhesion of the paint onto surfaces. Also, the paint will not sink into the substrate, then you have a nice polish and even surface.
Paint pouring does use a lot of pigment, which tin weigh a considerable corporeality when pouring. The stretch canvases are hollow at the back with pieces of wooden stretches. If you do a heavy cascade, the paint can cause sagging to occur, which will create an uneven pour. If left, the stale paint is more likely to crack. But place a flat card or business firm flat object to brace the back of the sail.
At that place are also things like wooden canvas keys that assist to keep the canvas tension at appropriate levels.
Other Acrylic Pouring Materials
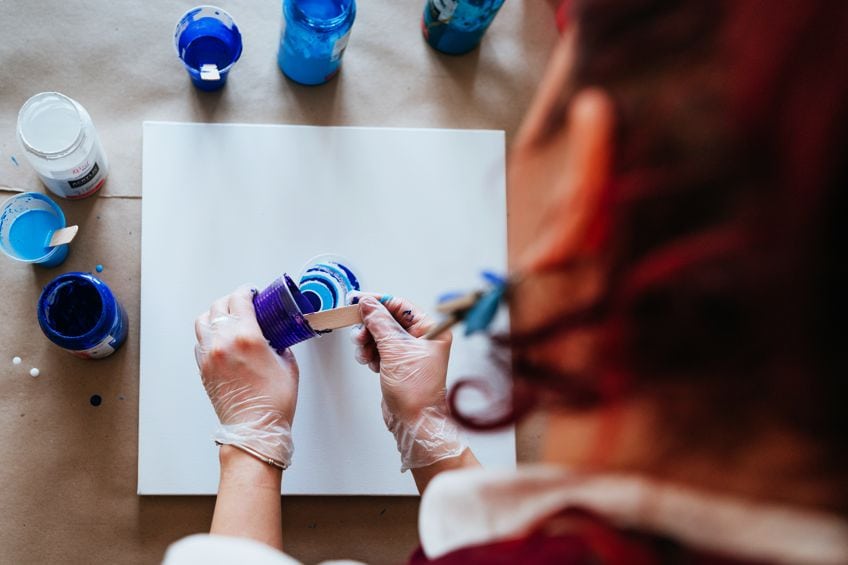
You lot can likewise add together in some accessories for acrylic pour painting. The almost common and easiest item you can employ is the newspaper cups, which y'all tin utilize for diverse acrylic cascade techniques. You can also apply palette knives, spatulas, or stirring sticks, which are perfect for mixing and making an even surface of the pigment. To go on the paint in and to help with pre-mixing colors, a clasp bottle with measurements on the side can assistance provide more accurate amounts of paint.
You will likewise need newspapers or old sheets; you lot could also apply plastic sheeting or a tray for smaller pours. These volition help to proceed the mess to a minimum and make things easier to make clean upwards afterward and protect the surfaces yous are working on.
The paint usually has to pour or fall off the sides, and so information technology needs to be elevated slightly so the paint can reach all sides and does non stick to the bottom. To do this, you can use glasses, tins, or jars that y'all can place the canvas on. You too go specific sail stands you tin purchase. Equally long as the canvas remains even while doing and then. Another item you lot will demand is gloves, as this is messy work, you practice not desire to have to struggle to get paint off your hands subsequently yous are done.
As you gain more feel, yous might include other materials like a accident torch, or silicone oil. The blow torch and the heat it produces help to preclude bubbling and too assistance prevent certain defects from forming. The heat also allows the lighter colors to rise to the surface.
The silicone oil rises to the surface when poured and creates circular cells, which can as well reveal other layers of color beneath. This is quite a popular and striking acrylic pour technique.
Yous can get both high viscosity and low viscosity silicone oil. Both of these produce different results, the high viscosity oil generally produces many smaller cells, while the low viscosity will produce larger cells.
An Acrylic Pour Painting Tutorial
Now you lot have all your supplies and materials ready, you demand to fix a working area. You will need to lay down plastic sheeting, even on the floor, if necessary. Dried acrylic pigment is very difficult to remove from surfaces. Once this is done, gather all your other necessary materials, paints, and cups, and then that everything is easy to reach.
Before yous begin, put on some gloves, which help protect you from getting paint on your skin and hands. Once placed on your object that elevates your canvas, you can also check that the panel or sail is even with a spirit level. You lot want to brand sure it will be level, otherwise, the pigment might pool, or runoff and you have washed everything for nothing. Whatever surface you are going to paint on, it needs to exist clean.
Remove any grit and, if necessary, grease, for a clean and smooth surface. Whatever grease left on the surface will reduce the chances of the paint holding onto or securely remaining on the surface.
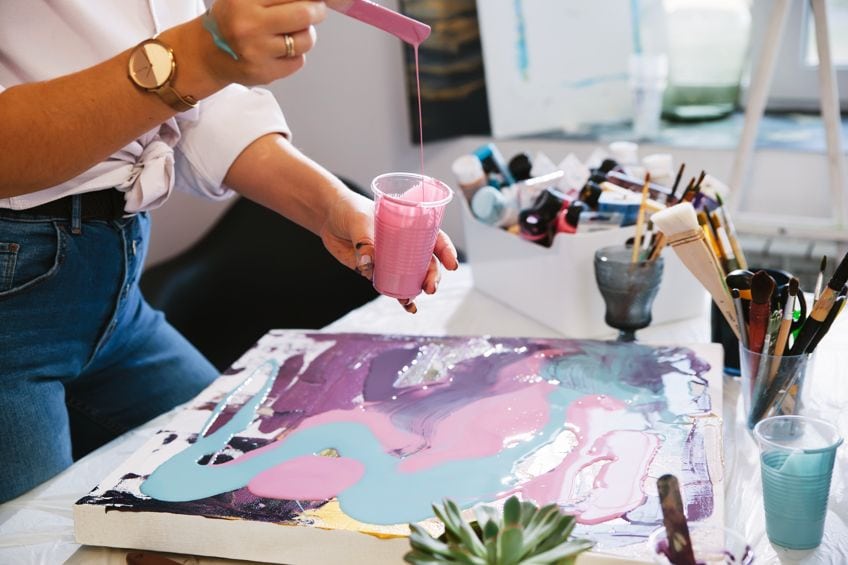
Mixing the Acrylic Paints
The basic guide for mixing is quite simple, place some of your acrylic paint into your cup, and and then add in the same amount or double the amount of pouring medium. The amount of medium will depend on the type of pouring medium you lot cull to utilize. The aim is to get a paint consistency that is like to honey, not too thin and non too thick. You can likewise add a little water and mix to attain the correct consistency.
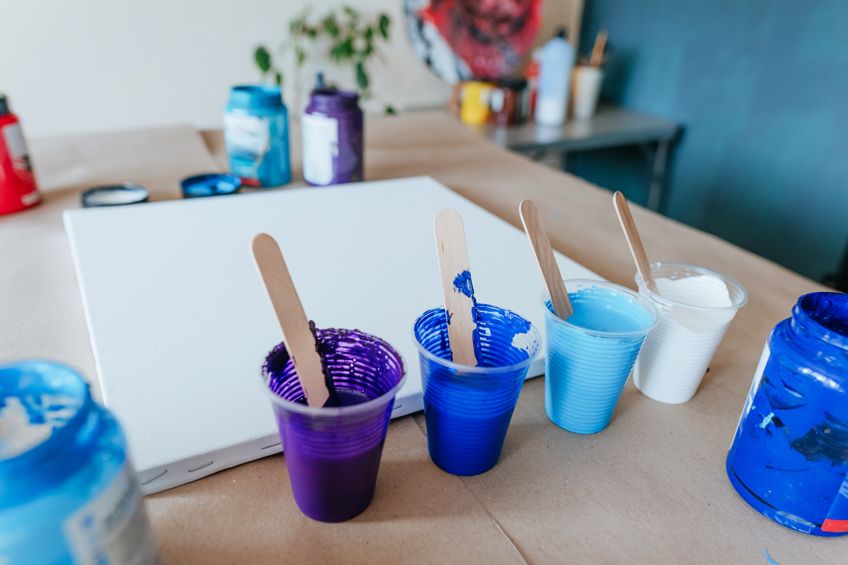
After you have the proper consistency, you can then include silicone oil. This is optional, and you can add in 1 or two drops and mix. Let the pigment mixture stand a fiddling so that the bubbles tin can come out and you tin become rid of them. Many even prepare their pouring mixture a day in advance to avert bubbles. If you are in too much of a bustle and yous cascade straight abroad, y'all are more than than likely going to get pockmarks or pits everywhere.
Determining the Mixing Ratio
You might be wondering how much paint and medium to utilize? Can you merely gauge or is there a mode to determine accurate amounts? Achieving the correct ratio does involve some practice as it does depend on the consistency of both the pigment and medium used.
A general method does include using 1 part acrylic paint and 1 office pouring medium, which is a 1:1 ratio. Mix this ratio and test the consistency. Notwithstanding, if it all the same seems too thick, you lot can add in a little more medium or water. Call back, you can but add in 30 percentage of full h2o.
The correct consistency is what makes the perfect pour, if you lot brand it too sparse, you will not go the nice patterns and the paint will run all over the identify.
Too thick, the paint becomes difficult to spread evenly and you also will not get the patterns yous want. Once you determine the correct consistency with the products y'all are using, information technology is piece of cake to go the same results in the future.
Equally a reference for beginners, there are some general methods you can apply to go the right consistency. Below are some recommendations for using different pouring mediums. One is using Floetrol, which is a paint additive that improves the workability of h2o-based paints, the other is your professional person pouring medium, and an culling using mucilage. First, mix the paint and medium, and and then add the water.

- Professional person Pouring Medium: One part paint, one and a half parts medium, and half water.
- Floetrol: This is the same every bit for the above. Add ane-part paint, one and a half parts medium, and one-half function water.
- Mucilage: Equally mentioned, this could exist Almer's gum or PVC mucilage. Add together in one part pigment, i and a half parts medium, and one role water.
An fifty-fifty simpler mode to determine the ratio is to apply a pouring calculator. You volition just need to fill out some pertinent data like the length and width of your substrate, and it will determine the amount of paint needed.
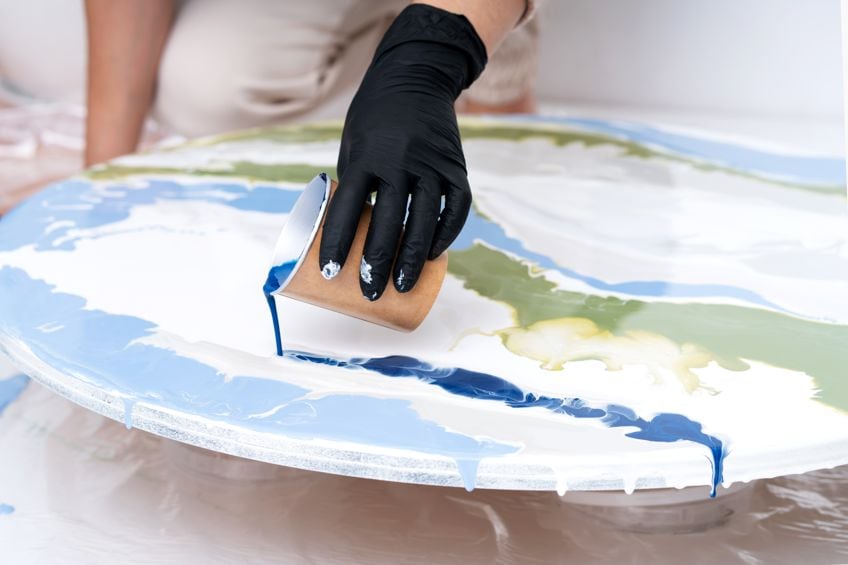
Paint Pouring Techniques
Since this is an article for beginners, we will be dealing with a basic tutorial on the traditional acrylic cascade. Yet, there is also a listing of some more than advanced pigment pouring techniques as well. The traditional method is quite simple, all you lot demand is to mix your paint in unlike cups, and and then you cascade the pigment colors individually onto the canvas. It is harder to create more complex designs this way, only information technology does provide more command over where the colors go, and information technology is perfect as a starting indicate for acrylic pour painting.
In one case you have added your paints, yous can pick up the sail and tilt it in diverse ways to class basic patterns.
Retrieve, to let the paint run over the edges to embrace the sides likewise, for a more than finished result. The traditional method is great for getting the feel of the paint on the canvas and how to manipulate information technology without adding in whatever additives or doing any other more challenging acrylic pour techniques. Once you take the traditional method perfected, you can move on to other pour techniques.
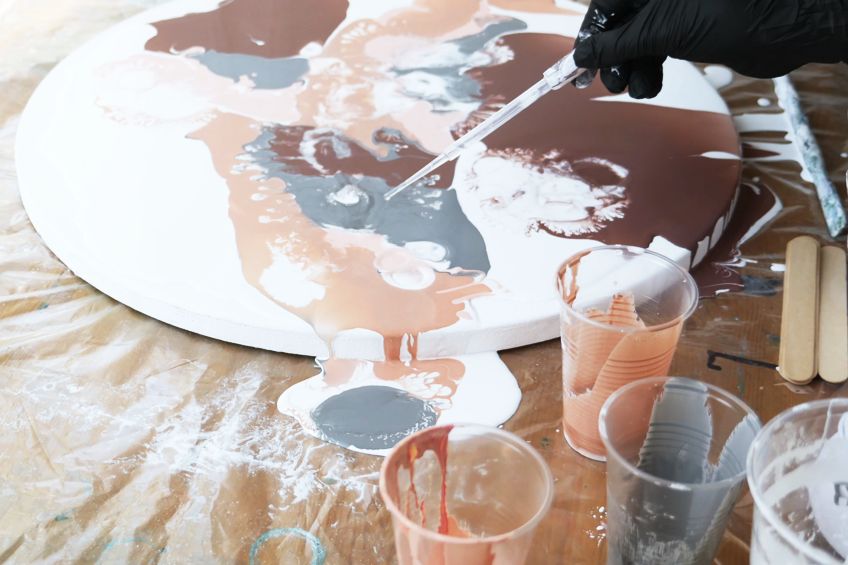
Dirty Acrylic Pour Technique
This method is a variation of your traditional pour. You follow the same steps by pouring paint into split up cups. All the same, instead of pouring them onto the canvass separately, yous take a larger container and pour or layer each color in in that location. Then you take the unmarried cup with all the paint and pour this over the canvas. You create more colors during this process, only y'all have less control over where the colors go. You should besides acquire a piffling about color theory, to avoid creating any undesirable colors.
How you pour the different paints into the single cup will have a office to play in the final expect of the cascade. You tin experiment to come across what happens by pouring down the side of the loving cup or pouring into the middle of the cup. The speed at which yous pour can also have an effect. Pouring faster volition brand the pigment sink to the bottom, while the paint will sit more on top if poured slower. Once you have poured the paint onto the canvas, again, accept it and tilt it to brand sure the entire surface is covered.
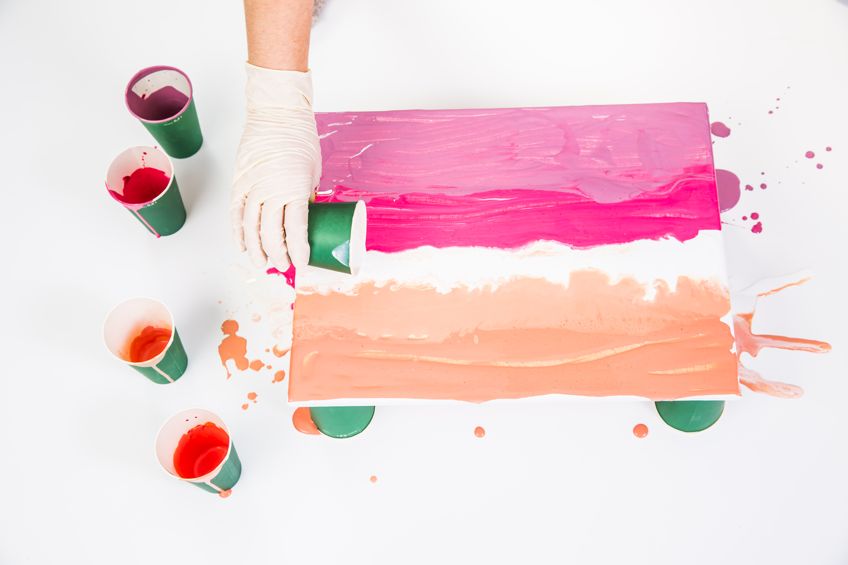
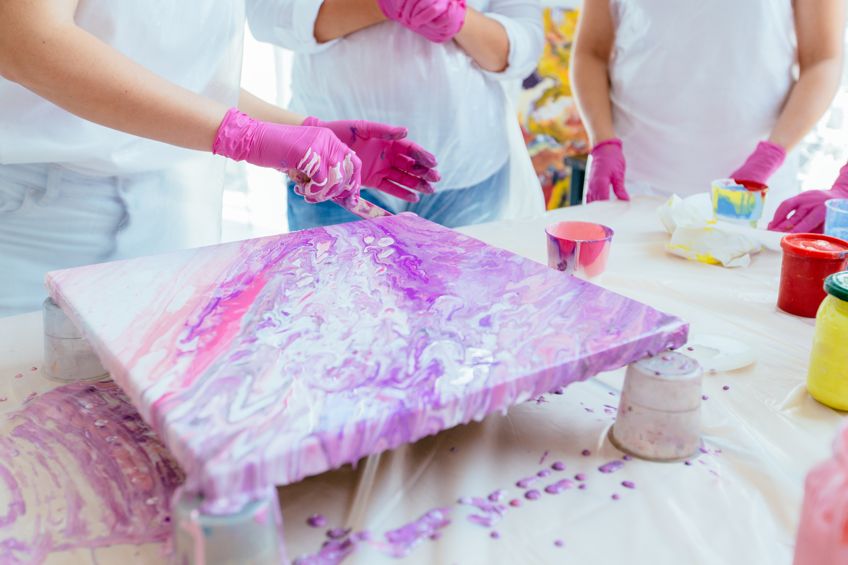
Puddle Pouring Technique
This is also a slight variation from the traditional pour. Y'all make full all your cups with the unlike colors of paint, simply instead of pouring colors beyond the canvas, yous pour a puddle of paint and within this puddle, you lot pour more colors, so the paint expands. You lot tin can choose to cascade larger amounts of paint or smaller amounts of different paint for more variations in color.
When you tilt the canvas all the paints will merge, creating various patterns.
Tree Band Pouring Technique
This begins in the aforementioned manner as your muddied pour, with layers of paint in a single cup. One time you have prepared your paint, pour information technology over the center of your canvas slowly. Then, you can move slowly in a circular motion, which you will detect creates the rings. You can also move it back and forth slightly equally you maintain a steady catamenia of paint.
The slower you can cascade, the better the rings will come out. As y'all cascade, the paint volition expand over the canvas and expect like the rings of a tree. In one case you have done pouring, you can also slowly tilt the canvas in all directions to encompass the unabridged surface. The movement is slow because you want to conserve the shape of the rings. You tin can likewise leave out the tilting of the canvas to keep the rings at their best, simply y'all will nigh likely need quite a lot of paint to do this.
You can too do what is known as wreck-a-ring-pour. Earlier you lot tilt the sail and after y'all accept formed the rings, use a stick or other implement to depict lines through the paint. When tilting the canvas, it produces unique patterns.
Flip Cup Pouring Technique
Yet some other variation of your dirty loving cup pouring technique. Once yous have prepared your single cup with all the layered paint colors, you tin try and flip the cup quickly and directly onto the center of the canvas or you can first flip the cup by placing a piece of paper-thin on acme of the cup start like a lid and then flipping it over and 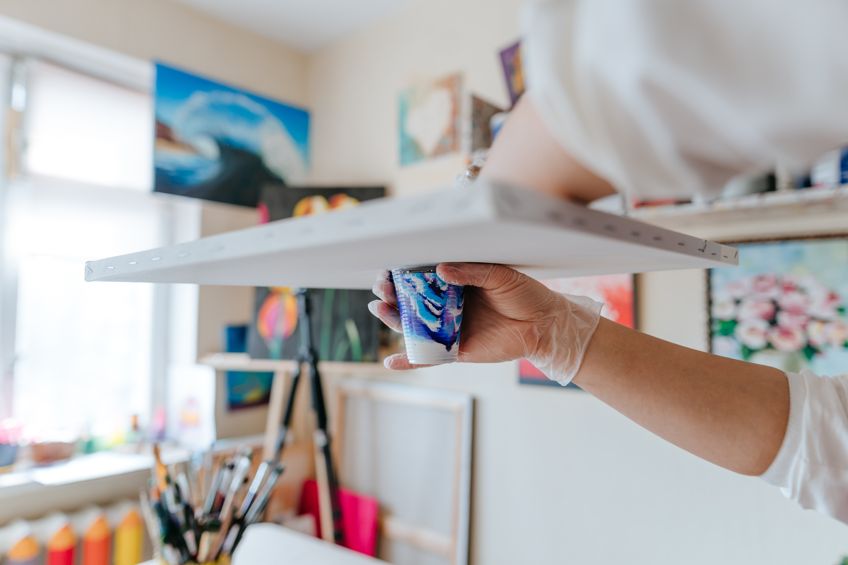
Await a little bit, until all the paint has shifted down, a articulate cup helps best for this. Once it looks like the paint is ready, lift the cup off the canvass or pull the paper-thin out while y'all lift the cup. The pigment should cascade out and expand on the surface. You can then slowly tilt the sheet so that the paint flows over the whole sail surface and sides. You lot can endeavor making pigment cells by placing the heavier paint at the bottom of the loving cup before flipping and pouring.
This technique may become a little messy if done incorrectly and y'all also need to understand the effects of the different colour combinations.
Making Utilize of Other Accessories During a Pour
The higher up is your beginner pouring techniques, and once y'all have these perfect, you lot can move on to other more avant-garde techniques. Many of these paint pouring techniques require the utilize of ordinary materials and items found around the home. At that place are now also specific acrylic pouring strainers available, designed to requite different patterns when pouring.
Using a Colander
You will be using a simple colander for this technique, which tin can create a kaleidoscope type of effect. The paint is prepared as you do for a dingy cup pour, yous then place the colander in the centre of your prepared canvas, or you lot tin experiment with placing it elsewhere. Whatever you lot decide, will change the final wait of the pour.
Transfer some of the pigment from the cup and place it in the colander and allow the paint to seep out.
Yous can then very slowly lift the colander then that all the paint tin can drip out onto the canvass. The design volition radiate from the point you lot placed the colander. Yous can then slowly tilt the canvas to get the pigment to menstruation over the entire surface. You tin experiment with smaller and larger colanders likewise every bit different size holes for unlike effects.
Funnel Pouring
To do this paint pouring technique, yous tin can utilize a funnel or bottle that can likewise work. The method is almost similar your dirty pour, but y'all add the paint to the funnel instead of a loving cup. Simply take the funnel and place it into a position on your canvas, your pattern will radiate from here. You lot can either agree the funnel so that the opening is closed on the canvass, or y'all tin can close the hole with your finger, which prevents the paint from spilling out. Add together or layer in your acrylic paint colors every bit y'all would do for a muddy pour.
Always consider the colors and how you layer them, as this will form your color patterns. On the spot where yous want to begin, in this case in the center as you are going to screw out, elevator or remove your finger to allow the paint to escape. You can and then shift the funnel to create a spiral pattern, which forms your puddles of paint. Continue until the pigment in the funnel is finished or until you are happy with the pattern formed. You tin can and so slowly remove the funnel, making certain you do not leave behind whatever unwanted drips.
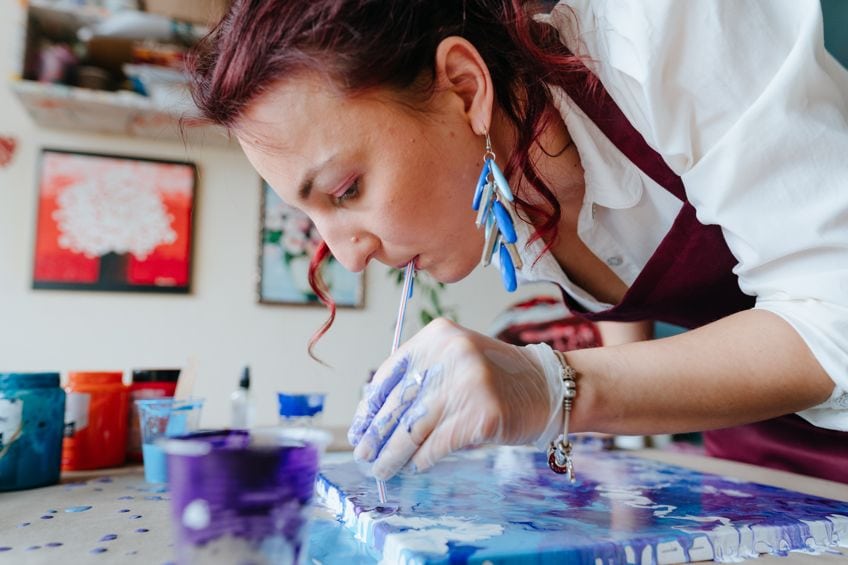
If yous have used enough paint to cover the entire area and y'all are happy, then that will be your completed cascade. Nonetheless, y'all can too tilt the canvas if yous have but covered a certain expanse so that the paint can move over the unabridged surface. Some other popular idea is to take a straw and accident the pigment across the canvas to create fifty-fifty more patterns.
String Pull Acrylic cascade
This can be a little more challenging equally the method is a little different from the others we have already covered. You will have to go yourself a length of string or strings, likewise as some acrylic paint with a medium. If you are doing multiple colors, proceed each color in a separate cup. You can place your piece of cord in each paint color. The length of the string can be established by knowing the canvas size. Once the string has been coated with paint, yous can remove information technology from the paint and identify them somewhere shut.
Side by side, you demand to apply a base of operations glaze of paint to the sail, this must be a contrasting color so that the string pattern can stand up out. Preferably exercise this before y'all coat your string.
Pour the pigment and cover the canvass surface, you tin can even out the paint with a palette pocketknife.
Carefully take the stop of a piece of pigment-coated string and place it onto the canvass in any mode you wish, making certain the terminate piece of the cord hangs over the edge. Slowly identify all the pigment-covered strings onto the sheet in the shape of your chosen design.
Once done, the piece of cord that is off the border of the canvas can exist grasped and pulled. Pull in a straight consistent line downward until the cord is off the canvas. The design left backside should be a foliage-like or spiral design. As mentioned, this is a more than challenging technique and may require some practice to get right. The paint consistency has to be perfect to get the all-time patterns.
Airship Dip Acrylic Pour Technique
This may be a bit more challenging than it seems. In theory, it is quite simple, you comprehend your sail with a prepared pouring paint mixture. Take a palette pocketknife and even out the paint, making sure to encompass the sides and edges likewise. You lot should also have some split up colors of pigment mixture ready. You can use these to create puddles on the surface. Include as many puddles as you like to form the desired design.
This is where the balloon comes into the film; take a blown-up airship and press this into the puddles you formed. You can use more than than one airship or merely wipe the balloon you are using before pressing down onto the next pool. Balloon dipping tin can make really interesting furnishings, like the i below.
You can leave it at that place, or you can also pour some of the prepared mixed paint into another bowl. Then dip the balloon into the paint and press lightly into areas on the canvass. Equally acrylic pouring is a lot about experimentation, y'all can carry on until you are happy with the results.
You tin can also heighten the procedure by using a straw to blow in certain areas you lot retrieve the blueprint needs a bit of adjustment. You tin can then utilise a blow torch if you wish and then get out the paint to dry out. You tin also include additives similar silicone oil for added effect.
More Pigment Pouring Techniques
The list higher up of acrylic pour techniques is but a few and there are many more than. On your journeying of acrylic cascade painting, you may fifty-fifty discover a technique yourself. Until and so, here is a shortlist of more techniques.
- Flower pouring
- Swipe method
- Fly pouring technique
- Ghost pouring
- Fractal dendrite technique
- Wave pouring
- Web, infusion, or injection pour technique
- Double-cup pour
- Dutch pour
- Chain pull, similar to the cord pull
- Dip canvass method
- Blob Painting
Finishing Touches
Once you lot have done your acrylic pour painting, you will need information technology to dry, which can exist done in 24 hours. However, if your paint layers are particularly thick, you can go out them for a further 48 hours. During this time, the pigment tin yet shift and move around, then it is important to keep it level and stable while drying. You practise non want to come back to a piece that looks completely different from what you started with. Including additives, could as well lengthen the drying time, so it is best to leave the painting for as long as possible to dry out thoroughly.
Y'all should also try to comprehend your painting so that no dust or clay can get onto the wet painting while it is drying. A small-scale plenty painting can be covered with a box, otherwise, a larger painting will crave a chip more than ingenuity. For example, yous can create a plastic tent from plastic sheeting.
Also, if you are doing more than than one cascade onto a single surface, allow enough time for the layers to dry a petty earlier moving on. When the first layer is not dry enough, and y'all pour over another wet layer, information technology tin can cause cracking in your final piece. Once the paint has dried, y'all can cease off the acrylic painting with a protective layer of terminate. These tin be water or oil-based, or even resin-based finishes. These finishes also take options, and so you can choose a satin or sleeky finish or maybe go for a matte terminate. This final stride provides immovability and protects the painting.
Acrylic Pouring Tips and Tricks
When you are a beginner in acrylic pouring, yous will need equally many tips and tricks as well as advice to create your paintings. Luckily, many artists have already been and done many acrylic pours and plant out what works and what will not piece of work. So, here are a few of these tips and tricks.
- E'er have enough pigment for a pour. It is okay if you accept too much only if you have too little, it can exist a problem. Some online pouring calculators can aid brand things easier for you., so you do not sit down with issues.
- You can pre–mix your acrylic paint in advance. This is specially helpful if you tend to mix as well much paint to begin with and saves you time in the future. Make certain to include distilled h2o in the mixture to prevent mold from forming. Clasp bottles come in handy for premixed
- Minimize waste past using reusable tools like silicone cups and sticks or spoons. Avoid doing pours that waste besides much paint and always brand just enough for each pour.
- Your canvas should always be level and stable for pouring and drying.
- Do not throw excess paint downwards the drain. This is not environmentally friendly, rather place the wet pigment in some true cat litter and permit it dry and throw it out with your regular waste matter. You can also dry the paint in a tin can or container, the h2o will evaporate and what is left y'all can throw in the trash.
- You can create your ain acrylic pour container or drip tray that can assist continue your workspace free of messes.
- Get rid of drips from the canvas edge with your gloved finger. While drying, these drips can continue to pull or shift the paint.
- Retrieve to go on the addition of h2o to your acrylic pigment mixture to simply thirty% of the full book. Effort to just add pouring medium first to reach the correct consistency, if possible.
- When choosing a pouring medium, consider the consistency. This is because different pouring mediums tin have dissimilar consistencies, which volition affect the acrylic pouring.
- Ever elevate your sheet or painting substrate when pouring so the pigment can flow over the edges.
- Make sure you know how the colors volition interact with each other.
- You can minimize bubbling by using a toothpick to pop the bubbles, or employ spray booze on the surface, or you can use a pocket-sized blow torch.
When attempting fluid art painting, the central is to have fun and to experiment with all the diverse pigment pouring techniques. The best office of acrylic pouring is exploring and uncovering all the unusual patterns yous can create. Each pigment pouring is a unique feel and an original painting.
Frequently Asked Questions
What Is Pigment Pouring?
Acrylic pour painting is an fine art grade that uses an acrylic paint mixture that is fluid, which you cascade over a canvass using various paint pouring techniques. A pouring medium normally has to be used with the paint. You tin can pour it onto various surfaces like canvas, wooden panels, boards, and even glass. The surface has to be properly prepared or primed before you begin painting.
What Is a Pouring Medium?
Since acrylic paint tin can be quite thick, to get the various patterns you usually exercise for pouring, the paint has to exist more fluid. To help with this, there are various painting mediums bachelor, which need to be added to the acrylic paint before doing a pouring. You get professional pouring mediums, and alternatives like Floetrol and even glue.
Why Is a Accident Torch Used in Acrylic Pouring?
Sometimes bubbling tin form while you are decorated pouring the acrylic pigment mixture. The blowtorch is used to prevent unwanted bubbles from forming and helps the lighter paint colors to reach the surface from under heavier paint colors. A hairdryer can also exist used for this purpose.
What Are the Best Paints for Acrylic Pouring?
When pouring, acrylic paints are your best option. However, there are dissimilar types of acrylics from heavy torso to soft trunk, and professional and student grades. The more mutual pick is your soft body acrylics as they are less viscous and crave less pouring medium, while heavy body acrylics demand a lot more medium. Costs tin likewise play a part as many of the paints cost a lot more than others.
Source: https://artincontext.org/acrylic-pour-painting/
0 Response to "Fluid Art Pouring Mediums How I Mix My Mediums Beginner Acrylic Pouring Tutorial"
Post a Comment